📝 Introduction
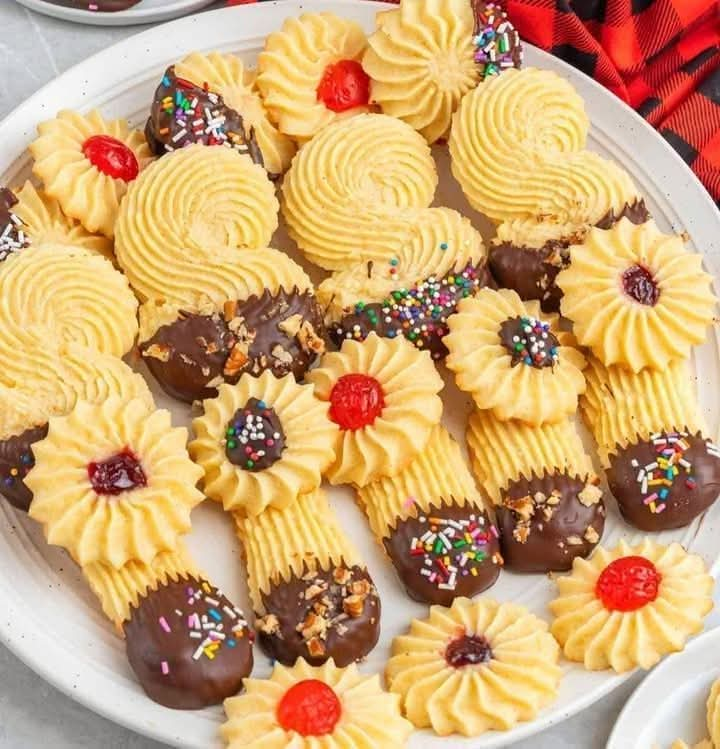
Butter cookies, known for their rich taste and crumbly texture, are a beloved treat in many cultures. Originating in Europe, especially Denmark, these cookies are often enjoyed during holidays and celebrations. Simple in ingredients yet decadent in flavor, butter cookies showcase the magic of baking with butter, sugar, and flour. Whether shaped into rings, piped into rosettes, or cut with cookie cutters, they’re a delight for all ages.
📚 History
Butter cookies have roots in 19th-century Denmark, where they were first mass-produced by Danish bakers. They became a staple export product and found their way into homes around the world, often packaged in iconic blue tins. Their simple, preservative-free nature made them ideal for storing and gifting. Traditional recipes were passed down through generations, emphasizing quality butter and simplicity.
💡 Benefits
While butter cookies are an indulgence, they come with a few noteworthy qualities:
- Natural ingredients: No artificial preservatives when homemade.
- Energy-rich: Provide quick energy from carbohydrates and fats.
- Mood-lifting: Comforting and nostalgic, they can boost mood.
- Versatile: Great base for flavor variations (vanilla, lemon zest, cocoa, etc.)
- Perfect for gifting: Long shelf-life when stored well.
🧪 Formation (Science of the Cookie)
The science behind butter cookies lies in the creaming method. Creaming butter with sugar incorporates air, giving the cookie structure and a light, tender crumb. The high-fat content from butter helps develop a melt-in-your-mouth texture, while flour gives it body. Minimal liquid is used to prevent gluten overdevelopment, which keeps the cookies crisp and tender rather than chewy.
🧂 Ingredients
| Ingredient | Quantity |
|---|---|
| Unsalted butter (softened) | 1 cup (227g) |
| Powdered sugar | 3/4 cup (90g) |
| All-purpose flour | 2 cups (240g) |
| Cornstarch (optional – for tenderness) | 2 tbsp (16g) |
| Vanilla extract | 1 tsp |
| Salt | 1/4 tsp |
Optional: 1-2 tbsp milk (only if piping the dough)
🍴 Method / Instructions
🔪 Preparation:
- Preheat oven to 350°F (175°C). Line a baking sheet with parchment paper.
- Prepare butter: Make sure your butter is at room temperature—not melted.
🥣 Step-by-Step Instructions:
- Cream the butter and sugar
- In a large bowl, beat softened butter and powdered sugar together using an electric mixer (medium speed) until pale and fluffy (about 2–3 minutes).
- Add flavoring
- Mix in vanilla extract and salt. Beat until combined.
- Add dry ingredients
- Sift flour and cornstarch (if using) together. Gradually add to the butter mixture, mixing on low speed. Dough will be soft but not sticky.
- Shape the cookies
- If piping: Transfer dough to a piping bag fitted with a star tip and pipe rosettes or swirls.
- If rolling: Wrap dough in plastic wrap, chill for 30 minutes, roll out, and cut into shapes.
- Bake
- Bake for 10–12 minutes or until the edges are just lightly golden.
- Remove and cool on a wire rack.
- Serve or store
- Once cooled, store in an airtight container. They last for up to 2 weeks at room temperature.
👨🍳 Tips & Variations
- For Danish-style cookies: Use only flour, butter, and sugar—no cornstarch or vanilla.
- Add-ins: Sprinkle tops with coarse sugar or dip cooled cookies in melted chocolate.
- Flavor twists: Add lemon zest, almond extract, or cinnamon to the dough.
- Holiday idea: Pipe into wreath shapes and add sprinkles before baking.
🥡 Storage
- Room temperature: 1–2 weeks in an airtight tin or container.
- Freezing dough: Wrap tightly and freeze for up to 2 months. Thaw in fridge before using.
- Freezing baked cookies: Store in airtight freezer bags for up to 1 month.
🧾 Nutritional (Approximate per cookie)
- Calories: 90
- Fat: 6g
- Sugar: 4g
- Carbohydrates: 8g
- Protein: 1g
